
Overview
Plus Composer is our new document templating and generation tool, introduced in WealthWorks+ release 4.21. With the Plus Composer Word add-in installed, users can use this tool to create and edit their own templates, if required.
In the event the 'Plus Composer' Word add-in is not yet available to you, please follow the instructions here for further assistance.
Creating a Template
Before populating your Word template document with information already stored within Troika/WealthWorks+, open the template document. Ensure all standing data, to appear whenever this template is generated, is already populated. Format the document as you require it, including font, sizing, and positioning.
Close and save, ensuring the template document is saved in a .docx format.
Adding Data Fields Using the Composer Add-in to the Template
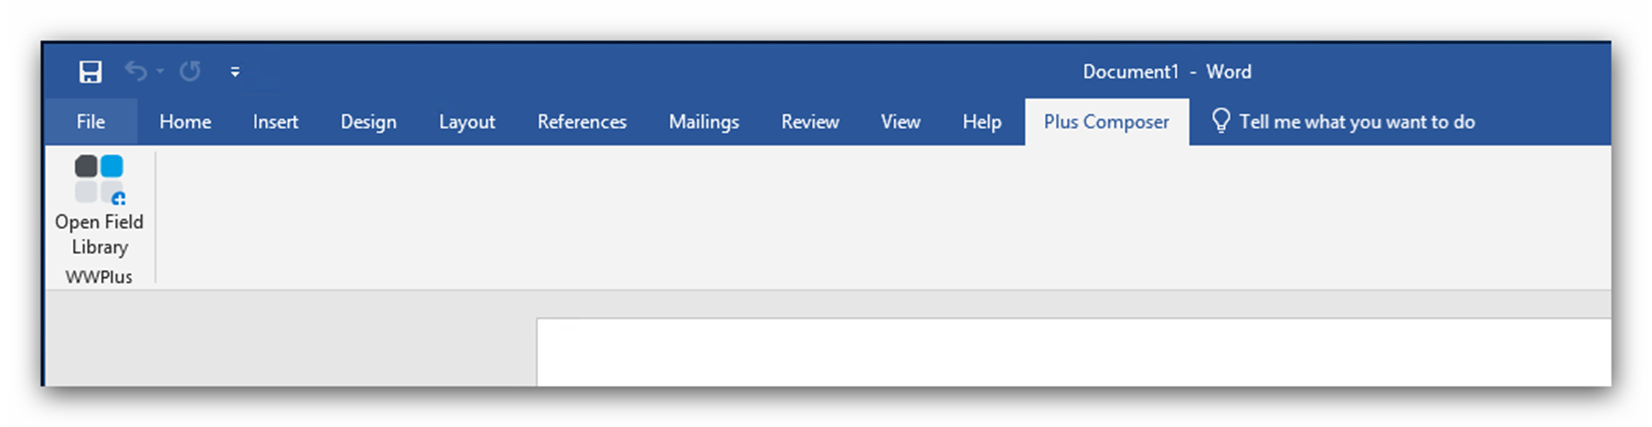
To add data, open the template document, select the new 'Plus Composer' menu, and 'Open Field Library'. This will load up the sidebar for creating and editing Composer templates:
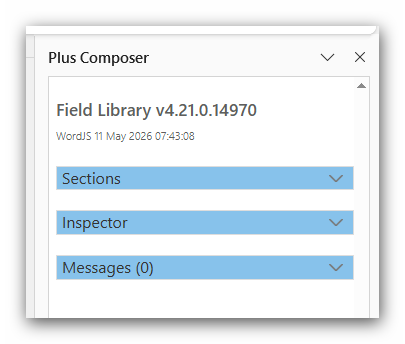
Select Sections > WW+ Defined > Add Field to be presented with a drop-down list of available options. Select the specific subject field you require then click 'Add Field' to add the field to the selection available to add to your template.
For example, to include the name of an entity onto a template, select Entity Details, then from the drop-down list select 'Name' and then Add Field:
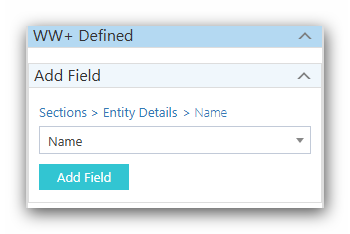
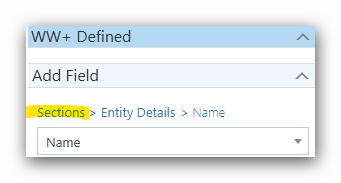
Once the Section has been selected, the 'breadcrumb' of the data being added will be displayed as above. The subsequent drop-down field will then display the fields available from within the Section selected. It is only when you have selected a field within a Section that it will be available to add to your template document.
Where items in the drop-down list appear in bold, there are further options to add the details held on an address. For example, Post Code.
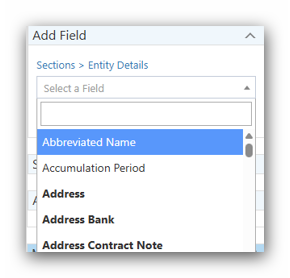
Navigate to the position within the template where this data should populate and click the 'Insert Field' button. The field will appear in Word when the formatting is turned on like follows:
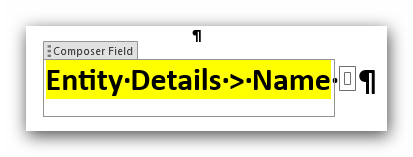
You can add the same fields multiple times, and in varying formats if you require, depending on the document you are trying to produce. If you require this name to appear elsewhere within the template, navigate to the next position and click the 'Insert Field' button again.
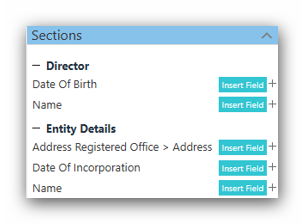
Continue to add further fields you require and insert into your template. In the below example, we have added the Name, Date Of Incorporation and Registered Office Address from the Entity Details section, in addition to the Name and Date Of Birth of a Director:
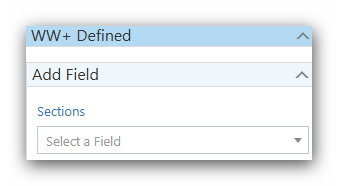
Please remember that, for each field you want to add, you will need to start your 'breadcrumb' and add the Section you need. You can do this by clicking on the Sections 'breadcrumb', which then clears:
Using the Composer Add-in to Add Additional Data Fields
Sections > WW+ Defined > Add Field will offer the first record (for example, a Director). In the event you require further records to be included on your template, these can be added.
Once the details of the first director have been added using Sections > Director > Name > Add Field, your Sections detail will display as:
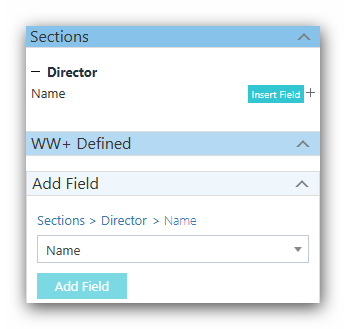
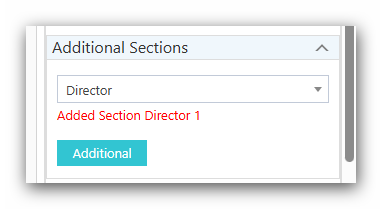
If you require further directors to be included on the template, select Additional Sections within Sections > WW+ Defined, and select Director from the drop-down list for each additional director you require. You will see confirmation that 'Added Section Director n' is now available within Sections > WW+ Defined > Add Field:
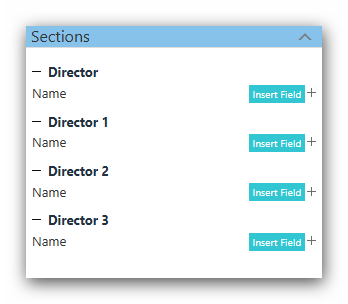
Revert to Sections > WW+ Defined > Add Field and select Director 1 from the drop-down list. From the Add Field drop-down list, add Name. Repeat for each additional Director:
An Alternative for Searching for Data Fields
The Search Field is an alternative way of accessing the data within Sections. It searches across all fields based on the field content, as opposed to the subject.
For example, searching for 'Name' will present all areas of data where a 'Name' is present within it, without having first filtered by subject (e.g. Director).
Adding Manually Defined Data Fields Using the Composer Add-in to the Template
To add any additional user-defined fields not stored elsewhere within Troika/WealthWorks+, select Sections > Manually Defined > Add Manual Section. Enter a section name and click 'Add Section'.
Navigate to Add Manual Field, select the newly added section from the Section drop-down list. Enter a field name for the user-defined field and select the type of data to be expected for this field (e.g. Date, Numeric, Text, or Yes/No). Select 'Add Field' to add the field to the selection available to add to your template. Continue to add further fields in this section, if required.
Once done, navigate to the position within the template where this data should populate, and click the 'Insert Field' button next to that new user-defined field.
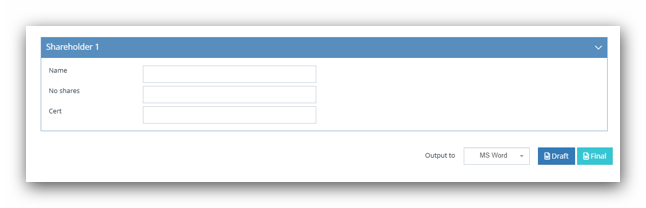
When using a Composer template with user-defined fields within it, users will be prompted to manually enter the required user-defined information before running the template, e.g.:
Date Formatting Options Available
When adding a 'Date', users have several date field options available across all date fields. These are set within the + button next to 'Insert Field':
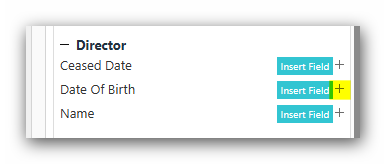
The following options are available:
- dd/MM/yyyy = 19/09/1980
- dddd, MMMM d, yyyy = Friday, September 19, 1980
- dd/MM/yyyy HH:mm = 19/09/1980 00:00
- Full Date = 19th day of September, 1980
It is also possible to split up the individual parts of the date (eg. Day, Month, or Year), allowing them to be put mid-sentence. For example, 'the agreement will take effect on 'Day' of 'Month' in the 'Year'.'
Completing Templates
Once complete, templates should be saved. The template can then be uploaded to your WealthWorks+ application using Options > System Administration > Composer Admin.
These templates are then automatically saved to your default Document Store location (shown within Options > System Administration > Other Settings > Documents > DocumentStoreLocation), in an automatically created \global folder.
This article was last reviewed 07/2026.
This article is confirmed to be applicable from WealthWorks+ release 4.21.